admin のすべての投稿

配置確認

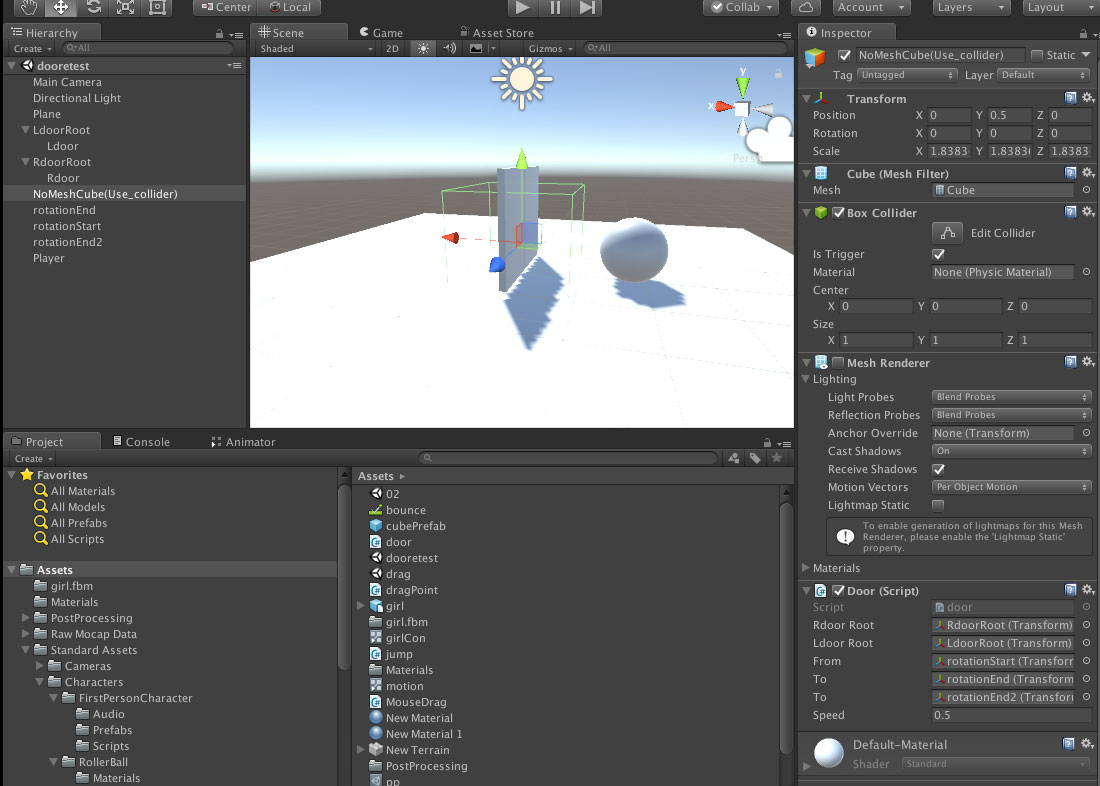
配置確認(未完成)2017/10/25 AM11時変更

using System.Collections;
using System.Collections.Generic;
using UnityEngine;
using UnityEngine.UI;

using System.Collections.Generic;//必ず必要

public class dicPractice : MonoBehaviour {

	public GameObject ballPre;//ボールプレファブ用
	public InputField numInput;//インプットフィールド用
	public InputField scnNumInput;//インプットフィールド用

	public Button subBtn;//シーン戻るボタン
	public Button addBtn;//シーン次ボタン


	Dictionary<int, List<string>> timeList1;//多重化Dictionary
	List<string> tempList ;//テンポラリ用のList

	List<GameObject> goList;//生成したゲームオブジェクトの全リスト
	int scenceNum;//現在のシーン番号用変数

	void Start () {
		//Dictionary,Listの追加
		timeList1 = new Dictionary<int, List<string>> ();
		tempList = new List<string>();

		goList = new List<GameObject> ();

		//※※シーン番号ゼロはシーンが空の意味に変更
		scenceNum = 0;//現在のシーン番号初期化//保存データ読み込み時にはシーン番号を1以上にする
	
		//シーン数がいくつかあるかチェックする空なら0を,
		int scnDicCount = timeList1.Count;
		if(scnDicCount < 1){
		scnNumInput.text = scnDicCount .ToString ();//シーン番号の数字を文字に変換
		}else{
			scnNumInput.text = scenceNum.ToString ();//Dictionaryが空でなかったらシーン番号を表示させる(保存機能追加後に機能する)
		}

		//シーン番号0以下なら次シーンボタンオフに
		if (scenceNum <= 1) {
			subBtn.interactable = false;
		}

		//シーン番号がゼロで戻るボタンオフに
			addBtn.interactable = false;


		//json用オブジェクトを作成
		myData jdata = new myData();

		//キャラ10体作成
		for (int i = 0; i < 10; i++) {
			GameObject go = Instantiate (ballPre, new Vector3 (i * 2.0f, 0, 0), Quaternion.identity) as GameObject;
			string myAIname =  "AI" + i.ToString ();
			go.name = myAIname;

			//goListに 生成したgoをgoListに追加
			goList.Add(go);

		}

	}
		

	//番号で呼び出す用
	public void numDel(){
		int objNum = int.Parse (numInput.text);//インプットフィールドで受け取った番号をintに変換
		int scnNum = int.Parse (scnNumInput.text);//インプットフィールドで受け取った番号をintに変換
		scnNum--;//Dictionaryには0から収納されているので1引く
		List<string> temp2List = new List<string> ();//一時的なList作成

		Debug.Log ("呼び出し番号_" + objNum);
		Debug.Log ("シーン番号_" + scnNum);
		temp2List = timeList1 [scnNum];//シーン番号scnNumのJSONをLISTに読み込む
		var myObject = JsonUtility.FromJson<myData>(temp2List [objNum]);//シーンゼロのobjNum番のJSONのみをオブジェクトに変換
		Debug.Log ("X=" + myObject.posx);//デバッグ用
		Debug.Log ("Z=" + myObject.posz);
		Debug.Log ("name=" + myObject.name);
		//Debug.Log ("time=" + myObject.time);

	}


	// シーン追加用
	public void dicAdd(){

	//	int dicCount = timeList1.Count;//シーン番号の最大値確認用
	//	scnNumInput.text = dicCount.ToString ();//シーン番号の数字を文字に変換

		//記録する準備
		myData jdata = new myData ();
		int i = 0;
		//goListの中身をJSONにするforeach
		foreach (var n in goList) {

		jdata.id = i;
			jdata.name = n.name;
			jdata.posx = n.transform.position.x;
	jdata.posy = n.transform.position.y;
	jdata.posz = n.transform.position.z;
	jdata.time = i * 10;//dummy data

		string json = JsonUtility.ToJson (jdata);//オブジェクトをJSON文字列に変更
		//	Debug.Log(n.name);
			tempList.Add (json);//LISTにJSONを追加
			i++;
		}


		//timeList1に書き換えなのか追加なのかチェック

		if (timeList1.ContainsKey(scenceNum ) )//現在のシーン番号がtimeList1に含まれているとき
		{
			timeList1[ scenceNum ] = tempList;//timeList1のscenceNumのリストを入れ替え
		}
		else
		{ //現在のシーン番号がtimeList1に含まれていないとき
			timeList1.Add( scenceNum , tempList );//timeList1に新規追加
			//シーンが増えたので現在のシーンも追加
			scenceNum++;
		}


		//ボタン関連処理
		//現在のシーン番号が0より大きければ<ボタン表示
		if (scenceNum > 1) {
			subBtn.interactable = true;
		}

		//現在のシーン番号がtimeList1と同じなら>ボタン隠す
		if (scenceNum == timeList1.Count) {
			addBtn.interactable = false;
		}

		//現在のシーン番号がtimeList1より小さいなら>ボタン表示
		if (scenceNum < timeList1.Count) {
			addBtn.interactable = true;
		}
			
		scnNumInput.text = scenceNum.ToString ();//シーン番号の数字を文字に変換し表示
	}


	//シーン番号次へボタン
	public void  scnNumAdd(){
		//現在のシーン番号を1足す
		scenceNum++;

		//シーン番号をInputFileldに表示書き換え
		scnNumInput.text = scenceNum.ToString ();

		//現在のシーン番号が0より大きければ<ボタン表示
		if (scenceNum > 1) {
			subBtn.interactable = true;
		}

		//現在のシーン番号がtimeList1より大きければ>ボタン隠す
		if (scenceNum >= timeList1.Count) {
			addBtn.interactable = false;
		}
	}
		

	//シーン番号戻るボタン
	public void scnNumSub(){
		//現在のシーン番号を1減らす
		scenceNum--;

		//シーン番号をInputFileldに表示書き換え
		scnNumInput.text = scenceNum.ToString ();

		//現在のシーン番号が0以下であれば<ボタン隠す
		if (scenceNum <= 1) {
			subBtn.interactable = false;
		}

		//現在のシーン番号がtimeList1より小さければ>ボタン表示
		if (scenceNum < timeList1.Count) {
			addBtn.interactable = true;
		}

	}

}


[System.Serializable]
public class myData {
	public int id;
	public string name;
	public int time;
	public float posx;
	public float posy;
	public float posz;

}


タップした位置に移動

動画のような動きを実現します

2017/11/02更新,次々タップしてゴールをどんどん変更できるようにした

ここからダウンロードできます

using UnityEngine;
using System.Collections;
using System;

public class tapMove : MonoBehaviour {

	//AIの変数用
	UnityEngine.AI.NavMeshAgent agent;

	//hit情報(タップ先)情報の格納用
	RaycastHit hit;

	//タップ用レイの準備
	Ray ray;

	[SerializeField, HeaderAttribute ("circlePrefabをここにアサイン")]
	public GameObject circlePre;

	//レイヤーマスクでタップを無視するレイヤー設定用
	LayerMask mylayerMask;

	//アニメーターの変数用
	Animator animator;


	//初期化
	void Start () {
		agent = GetComponent<UnityEngine.AI.NavMeshAgent>();//AIをこのスクリプトがあるゲームオブジェクトから探す
		animator = GetComponent<Animator> ();//このゲームオブジェクトからアニメーターを探す
		int layerMask = LayerMask.GetMask(new string[] {"Default"});//レイヤーマスクの設定
		mylayerMask = layerMask;//これ何だっけ?
	}


	//毎回処理します
	void Update () {

	
			// 左クリックしたときに、
			if (Input.GetMouseButtonDown (0)) {
				// マウスの位置からRayを発射して、
				ray = Camera.main.ScreenPointToRay (Input.mousePosition);
				// 物体にあたったら、
			if (Physics.Raycast (ray, out hit, 30f, mylayerMask)) {
					// その場所に、Nav Mesh Agentをアタッチしたオブジェクトを移動させる
					agent.SetDestination (hit.point);

					// "Run"アニメーションに遷移
					//	animator.SetBool ("Wak", true);
					spawnPrefab ();
				}       


		}
		// 目的地とプレイヤーとの距離が1以下になったら、
		if (Vector3.Distance(hit.point, transform.position) < 1.0f) {

		}
	}

	//ターゲットマーカーを表示
	void spawnPrefab(){

		string delPreviusGO = circlePre.name;//Prefabの名前を取得する
		try{
		GameObject deathObj =  GameObject.Find (delPreviusGO);//Prefab名のゲームオブジェクトがあったら
			Destroy(deathObj);//それを消す=つまり目的地に到着前にタップして行き先を変更した時用
		}catch(NullReferenceException e) {//見つからなかった時の処理(特に何もしていない)
			Debug.Log ("noGO");
		}

		Vector3 mypos ;//行き先の座標設定用
		float myPosy = hit.point.y + 0.1f;//若干高い位置にマーカー表示させる
		mypos = new Vector3 (hit.point.x, myPosy, hit.point.z);//Yだけ少し高くした座標作成
		GameObject circleGO = Instantiate(circlePre, mypos, circlePre.transform.rotation) as GameObject;//Prefabを生成する
		circleGO.name = circlePre.name;//Prefabでなくゲームオブジェクトにして名前を設定する(上で名前で検索して消すために設定いている)

	}


}

元ネタはこちらのスクリプトを参考にしています

また,Prefab側にはこのスクリプトをあてて,IsTriggerをONにしています

using System.Collections;
using System.Collections.Generic;
using UnityEngine;

public class triggerDestroy : MonoBehaviour {
	Animation anim;
	bool animCheck;
	// Use this for initialization
	void Start () {
		anim = gameObject.GetComponent<Animation> ();
		animCheck = false;//noPlayning
	}
	
	// Update is called once per frame
	void Update () {
		if (animCheck) {
			if (!anim.isPlaying) {
				print ("end");
				animCheck = false;//noanimPlay
				Destroy(this.gameObject);
			}
		}
		
	}
	void OnTriggerEnter(Collider other) {
		//Debug.Log ("ON");
		if (!anim.isPlaying) {
		anim.Play ();
		animCheck = true;//Playing
		}

	}


}

ターゲットの赤い輪はPhotoshopで作成し,Planeにテクスチャで貼付

パッケージのダウンロード(ここ

ドアが左右に回転して開くをむりやりc# で

コライダのオブジェクトにアサインする


スクリプト

using System.Collections;
using System.Collections.Generic;
using UnityEngine;

public class door : MonoBehaviour {


	public Transform _RdoorRoot;//右ドアのルート入れる
	public  Transform _LdoorRoot;//左ドアのルート入れる
	bool doorCheckBool = false;//ブーリアン
	float stTime;//コライダにヒット開始時間

	public Transform from;//元の角度
	public Transform to;//90度の角度を入れたnullをアサイン
	public Transform _to;//−90度の角度を入れたnullをアサイン
	public float speed;//回転速度

	void Update () {
		if (doorCheckBool) {
			_RdoorRoot.rotation = Quaternion.Slerp (from.rotation, to.rotation, (Time.time - stTime) * speed);
			_LdoorRoot.rotation = Quaternion.Slerp (from.rotation, _to.rotation,  (Time.time - stTime) * speed);
		}
	}
		
	void OnTriggerEnter(Collider other) {//コライダ入ったら
		doorCheckBool = true;//ブールをtrueにするとUpdateで作動する
		stTime = Time.time;//現在の時間を記録しておく
		GetComponent<BoxCollider>().enabled = false;//1回作動させたらコライダーをオフにして使用できなくする
	}
		
}


配置方法

実行結果

ドラッグして位置決め

このスクリプトは自由座標に移動する

実際には決まったMatrixにスナップするように,数値を丸めたほうが扱いやすい

その際に下のPlaneにグリッドを表示させ,そのグリッドを光らせるなどの対処が必要かど

スクリプト

using System.Collections;
using System.Collections.Generic;
using UnityEngine;

public class dragPoint : MonoBehaviour {
	RaycastHit hit;
	Ray ray;
	Vector3 currentPos;//最終位置保存用変数


	void OnMouseDown(){ //マウスクリック開始時用
		currentPos = this.transform.position;//上昇前の値を入れる
		this.transform.position = currentPos + new Vector3 (0f, 1f, 0f);//Y軸に1だけ上昇させる
		currentPos = this.transform.position;//上昇した値を入れる
	}

	void OnMouseDrag(){//マウスドラッグ時

		ray = Camera.main.ScreenPointToRay(Input.mousePosition);//マウスクリックポジションをrayで取得する
		if (Physics.Raycast(ray, out hit, 100f)){//rayが当たった位置をhitに入れる
			this.transform.position = new Vector3 (hit.point.x, currentPos.y, hit.point.z);//XとZ座標だけをhitの座標にする
			currentPos = this.transform.position;//最終位置を変数に入れておく
		}  

	}

	void OnMouseUp(){//マウスクリック終了時
		this.transform.position = currentPos - new Vector3 (0f, 1f, 0f);//最終位置からY軸に1だけ下降させる
	}
}

追記

21行目を

this.transform.position = new Vector3 (Mathf.Floor(hit.point.x), currentPos.y, Mathf.Floor(hit.point.z));//

のようにMathf.Floorで小数点以下を丸め(切り捨て)ると,1m単位で動きます


実行結果

UnityにJSONで複雑な情報記録2

Dictionaryの中にListを入れることで解決をはかってみる実験


using System.Collections;
using System.Collections.Generic;
using UnityEngine;
using UnityEngine.UI;

using System.Collections.Generic;//必ず必要

public class dicPractice : MonoBehaviour {

	public GameObject ballPre;//ボールプレファブ用
	public InputField numInput;//インプットフィールド用

	Dictionary<int, List<string>> timeList1;//多重化
	List<string> tempList ;//テンポラリ用のList

	void Start () {
		//Dictionary,Listの追加
		timeList1 = new Dictionary<int, List<string>> ();
		tempList = new List<string>();

		//json用オブジェクトを作成
		myData jdata = new myData();

		//キャラ10体作成
		for (int i = 0; i < 10; i++) {
			
			GameObject go = Instantiate (ballPre, new Vector3 (i * 2.0f, 0, 0), Quaternion.identity) as GameObject;
			string myAIname =  "AI" + i.ToString ();
			go.name = myAIname;

			//json化準備
			jdata.id = i;
			jdata.name = myAIname;
			jdata.posx = go.transform.position.x;
			jdata.posy = go.transform.position.y;
			jdata.posz = go.transform.position.z;
			jdata.time = i * 10;//dummy data
				
			string json = JsonUtility.ToJson (jdata);//オブジェクトをJSON文字列に変更

			tempList.Add (json);//LISTにJSONを追加

		}

		timeList1.Add (0, tempList);//このゼロはシーン番号を想定中いずれ,変数で増やす

	}
		

	//番号で表示
	public void numDel(){
		int objNum = int.Parse (numInput.text);//インプットフィールドで受け取った番号をintに変換
		List<string> temp2List = new List<string> ();//一時的なList作成
		temp2List = timeList1 [0];//シーン番号0のJSONをLISTに読み込む
		var myObject = JsonUtility.FromJson<myData>(temp2List [objNum]);//シーンゼロのobjNum番のJSONのみをオブジェクトに変換
		Debug.Log ("X=" + myObject.posx);//デバッグ用
		Debug.Log ("Z=" + myObject.posz);
		Debug.Log ("name=" + myObject.name);
		Debug.Log ("time=" + myObject.time);

	}


}

シーン番号を変数化し,countで長さ出して全部呼び出して再配置するのと,記録するのを作る

あれ,,記録するために,も一個Dictionaryが必要かな?記録する対象を指定するのに使うために

UnityにJSONで複雑な情報をしまっちゃう


独自クラスを作成します

[System.Serializable]
public class myData {
	public int id;
	public string name;
	public int time;
	public float posx;
	public float posy;
	public float posz;

}

1行目が単にSerializableとなっているものがあるが,Systemをつけると動く


次にこれをDictionaryにインデックス番号(左=key),JSON文字列(右=value)のセットで保存します

この場合のインデックス番号はおそらくインクリメントさせて順序よく再生させた方が無難


登録&呼び出しはこちら.今回はテストなのでインデックス番号がオブジェクト番号になっているので,これでは目標のことができない

using System.Collections;
using System.Collections.Generic;
using UnityEngine;
using UnityEngine.UI;

using System.Collections.Generic;//必ず必要

public class dicPractice : MonoBehaviour {


	public GameObject ballPre;
	public InputField numInput;

	Dictionary<int, string> timeList2;

	void Start () {

		timeList2  = new Dictionary<int, string> ();


		//json test
		myData jdata = new myData();

		//キャラn体作成
		for (int i = 0; i < 10; i++) {
			GameObject go = Instantiate (ballPre, new Vector3 (i * 2.0f, 0, 0), Quaternion.identity) as GameObject;
			string myAIname =  "AI" + i.ToString ();
			go.name = myAIname;

			//json
			jdata.id = i;
			jdata.name = myAIname;
			jdata.posx = go.transform.position.x;
			jdata.posy = go.transform.position.y;
			jdata.posz = go.transform.position.z;
			jdata.time = i * 10;//dummy data
				
			string json = JsonUtility.ToJson (jdata);

			timeList2.Add (i, json);
		}
	}
	

	//インデックス番号でJSONを呼び出す
	public void numDel(){
		int objNum = int.Parse (numInput.text);//入力フィールドの文字をintに変換
		var myObject = JsonUtility.FromJson<myData>(timeList2 [objNum]);//ディクショナリのインデックス番号で呼び出したValueをJSON文字列からオブジェクトに変換
		Debug.Log ("X=" + myObject.posx);//オブジェクト内のposxをコンソールに出力以下同じパタン
		Debug.Log ("Y=" + myObject.posy);
		Debug.Log ("name=" + myObject.name);
		Debug.Log ("time=" + myObject.time);
	}

}

keyをシーン番号にするためにはどうすれば,,

Unityで Dictionary

UnityでDictionaryを使う準備

using System.Collections.Generic;//必ず必要

上の方のusingあたりに追記


Dictionaryを宣言

Dictionary<int, GameObject> prefabDic;

prefabDicという名のDictionaryを宣言


Dctionaryを初期化みたいなの

prefabDic = new Dictionary<int, GameObject> ();

をvoid Start(){ の中にかく


キャラ作成しつつDictionaryに登録

	//キャラn体作成
		for (int i = 0; i < 10; i++) {
			GameObject go = Instantiate (ballPre, new Vector3 (i * 2.0f, 0, 0), Quaternion.identity) as GameObject;
			string myAIname =  "AI" + i.ToString ();
			go.name = myAIname;

			prefabDic.Add (i, go);
		}

iはDictionaryの左列に この後で呼び出す番号にしている

goはゲームオブジェクトが入っているので,

prefabDic.Add(i, go);で番号とゲームオブジェクトのセットでDictionaryに追記(Add)される


dictionaryの3番のゲームオブジェクトを消す

GameObject delobj = prefabDic [3];
		Destroy (delobj);

prefabDic[3]で3番のゲームオブジェクトが呼び出されるので,それをDestroyしている


Unity Postprocessing入門

Unityで複数のエフェクトを一度に表示できるPostProcesingを実習します.

  1. Post Processing Stack Assetをダウンロード
  2. アセットをインポート
  3. Assets>Create>Post-Processing Profileを選択
  4. Profileが作成されるので名前を適当に変えておく(ここではccに変更)
  5. MainCameraを選び,Add Componentをクリック>post… で出てきたPost Processing Behaviour スクリプトを追加
  6. 先ほど作成したProfileをPost Processing BehaviourのProfileにドロップ
  7. Profileを選び,各項目を調整します
  8. Depth of Fieldを調整します.これは調整前
  9. 調整後
  10. Bloom を加えた場合(光る)
  11. Color Grading(いわゆるカラコレ)を加え,Filmicモードにした場合
  12. Grainを加えた場合(Film Grain=フィルムの粒子の再現と考えてください)
  13. ビネットを加えた場合(ビネット=フレーム周囲の減光)
  14. Ambient Occlusionを加えた場合(地面とオブジェクトの境界に影をつけること)
  15. Motion Blur(よくあるエフェクト)左:Motion Blurなし,右Motion Blurあり
  16. 上のMotion Blurの設定 シャッター角270度,10フレームサンプル,80%ブレンド
  17. Antialiasing左=なし,右=PresetはDefalut.クリックして拡大し,えりのJaggyを見比べる

使用しているアセットによっては使えないことがあります.


自己画像学習

https://www.tensorflow.org/tutorials/deep_cnn


をやるのに,


が参考になる


とりあえず,学習だけやってみる

~/projects/tensorflow/tensorflow/models/tutorials/image/cifar10 $ sudo python3 cifar10_train.py
>> Downloading cifar-10-binary.tar.gz 100.0%
Successfully downloaded cifar-10-binary.tar.gz 170052171 bytes.

160MBくらいある


Raspi でDL

この記事のゾウの認識のところまでやってみます

適当なディレクトリに移動し,

git clone https://github.com/fchollet/deep-learning-models.git

deep-learning-models ディレクトリができるので,そこへ移動

cd deep-learning-models

して

ls

で inception_v3.pyがあることを確認

sudo python3 inception_v3.py

エラーが出る

ImportError: No module named ‘scipy’

sudo pip3 install scipy

1時間くらい?インストールして

sudo python3 inception_v3.py

を実行

なんかダウンロードはじまる downloading data from https://github*******

7分くらいでelephant.jpgが無いってでる

リンク先の画像をinception_v3.pyと同じディレクトリに保存し,

sudo python3 inception_v3.py

実行するもまたエラー

lsするとlephant.jpeg
になってた

mv elephant.jpeg elephant.jpg

で拡張子を変更

sudo python3 inception_v3.py

‘n01871265’, ‘tusker’, 0.63436967), (‘n02504458’, ‘African_elephant’, 0.2854473), (‘n02504013’, ‘Indian_elephant’, 0.033294968)
認識成功

おつかれさまでした